Upgrading to a bigger drive or moving your operating system to a snappy SSD is one of the best ways to extend the life of a computer. Yet there’s a hidden issue few people think about: digital traces. Operating systems keep logs of files read or written, Windows can audit file access by default, and external drives often get registered in the event log. If you’re replacing a drive because you’re selling or recycling the computer, those traces could expose sensitive information. This guide walks you through the safest ways to transfer data when swapping drives, explains how to remove traces afterwards, and shows why using encrypted containers like Folder Lock can shield your data from prying eyes.
Understanding Digital Traces
Before transferring anything, it helps to understand what gets recorded when you move files. Modern operating systems routinely log file access events. For example, Windows file auditing uses event ID 4663 to record attempts to access a file, noting the user, process and object name. When you enable removable‑storage auditing, Windows also logs writes to USB drives using the same event ID and tags the event as Removable Storage. Other security tools, including anti‑virus software, may record when files are scanned during a copy operation.
These logs have obvious benefits for enterprise security, but if you’re trying to keep a low profile they represent a risk: forensic examiners can often see when a file was read, written or deleted by correlating multiple event records. In corporate environments, administrators can enable full access logging that captures every file read. Even the act of plugging in a USB stick is registered somewhere. Meanwhile, the Windows registry stores Most Recently Used (MRU) lists for applications, and virus scanners may log every file they inspect. Clearing these traces requires deliberate action, and some logs can’t be removed without administrator privileges.
Because of these footprints, simply copying your data in Windows Explorer isn’t enough if privacy matters. You need to plan your transfer, minimise what the operating system records and ensure the old drive is sanitised. The following sections explore the best ways to move your data and wipe your tracks.
Why and When to Transfer Data
Swapping drives isn’t just about secrecy it’s often necessary to upgrade your hardware. According to HP’s 2025 cloning guide, common reasons for cloning a drive include upgrading to a faster SSD, increasing storage capacity, creating a full system backup and deploying identical configurations across multiple machines. Cloning avoids the time‑consuming process of reinstalling Windows and applications, ensuring your new drive boots immediately with all settings intact.
Other scenarios involve moving only specific data. If you want to keep large media files but perform a clean installation of Windows, you might copy only your documents and photos. Sometimes you need to migrate from an aging mechanical HDD to a modern NVMe SSD for performance reasons; in this case, imaging or cloning ensures you get an exact copy while preserving hidden system partitions. Regardless of the reason, planning ahead will save time and protect your data from accidental loss.
Preparing for the Swap
- Back up important files – Always create a backup on an external drive or cloud service before making changes. Even when using professional cloning tools, a power cut can corrupt data.
- Gather hardware – You’ll need a destination drive with enough capacity, appropriate cables (SATA or NVMe adapters), and sometimes a USB‑to‑SATA enclosure if your machine has only one drive slot.
- Free space on the source drive – Delete unnecessary files and empty the recycle bin. Cloning and imaging are faster when the source contains less data.
- Update drivers and firmware – If you’re moving to an SSD, update the SSD firmware and enable TRIM support for longevity.
- Disable antivirus temporarily – Some security suites may intercept disk operations, slowing down cloning.
- Decide on a method – The next sections compare cloning, imaging, manual copy and live‑OS transfers.
Method 1 – Disk Cloning
Disk cloning creates a sector‑by‑sector copy of your entire drive, including the operating system, applications, hidden partitions and boot records. When you clone your drive onto a new disk, you can swap the drives and boot immediately as if nothing changed. HP notes that cloning is ideal for upgrading to a larger drive, moving to an SSD, or creating a complete backup.
Step‑by‑Step Guide Using AOMEI Cloner
The free AOMEI Cloner tool provides a simple workflow for cloning Windows drives:
- Prepare your destination drive: Make sure the new SSD or HDD has enough space for all data on the source drive. Back up critical data just in case. Connect it via SATA/USB or install it internally.
- Install and launch AOMEI Cloner: Download the software and choose Clone → Disk Clone.
- Select your source drive: Choose the original drive as the source and the new drive as the destination.
- Configure options: Enable SSD alignment to optimise performance and lifespan. If the new drive is larger, edit partitions to utilise the extra space.
- Start cloning: Click Start Clone and wait until the process completes. Cloning time depends on drive size and connection speed; expect roughly 30–60 minutes per 100 GB according to HP’s FAQ.
- Swap the drives: Shut down the computer, replace the old drive with the new one and set it as the boot device in BIOS. Your system should boot normally with all data intact.
Advantages and Considerations
Cloning is straightforward: the old drive remains untouched until you physically swap it, so you can revert if something goes wrong. It’s also the only way to retain installed software and system settings without reinstalling. However, cloning copies everything, including unused space and system logs. On Windows, file access logs and MRU entries remain preserved on the new drive; if your goal is to reduce traces, consider imaging or a clean install.
If your source drive has more data than the new drive, choose a cloning tool that can migrate only used space. AOMEI and Macrium Reflect support cloning from a larger disk to a smaller SSD as long as the data fits.
Method 2 – Imaging and Restore (Backup & Restore)
Disk imaging creates a compressed image file of your entire drive. You can store this image on an external drive and then restore it onto a new disk later. Imaging offers flexibility: you can keep multiple images for different points in time and restore them onto different hardware. AOMEI Backupper, Macrium Reflect and Clonezilla are popular tools.
Step‑by‑Step Guide Using AOMEI Backupper
- Create the backup: In AOMEI Backupper, choose Backup → Disk Backup. Select your source drive and choose a destination (external drive or network share). Start the backup and wait until the image file is created.
- Prepare the new drive: Connect your new SSD/HDD via USB or internally.
- Restore the image: In the tool, choose Restore → Select Image File, point to your backup, select Restore the entire disk and pick the new drive as the destination.
- Begin restore: Click Start Restore. After completion, replace the old drive and boot from the restored image.
Pros and Cons
Imaging is ideal if you want a portable backup or need to clone multiple machines. Because the image is stored elsewhere, the old drive can be wiped immediately. Additionally, some imaging tools allow you to exclude logs or temporary files before creating the image, reducing traces. The downside is that the process is slower than direct cloning and requires enough external storage to hold the image. Restoring also overwrites the destination drive entirely, so make sure nothing important resides there.
Method 3 – Manual File Copy
For users who only need to move personal data (documents, photos, videos and other files) and plan a fresh Windows installation, a manual copy is sufficient. According to AOMEI’s guide, manual copying is best for personal files and does not require extra software. It’s more flexible since you choose exactly what to transfer, but you’ll need to reinstall applications and reconfigure settings.
Steps
- Connect the new drive: Use a USB‑to‑SATA adapter or install it in your PC.
- Enable hidden files: Some important data resides in hidden folders like AppData. In File Explorer, go to View → Show → Hidden items.
- Copy and paste: Open File Explorer, select the folders you want (Documents, Pictures, Music, etc.) and drag them to the new drive or use Ctrl + C/Ctrl + V.
- Check special folders: If you use email clients or custom software, locate their data directories (e.g., .pst files for Outlook) and copy them.
- Verify integrity: Compare file counts and sizes on both drives to ensure everything transferred correctly.
Trace Considerations
Manual copying through Windows Explorer leaves a trail of file access and copy events. Windows logs which removable storage device was used and which program performed the operation. If you need to avoid logs, copy files within a live OS as described in the next method. Also remember to clear MRU lists and Windows Quick Access history afterwards using a cleanup tool or the Clean History feature in Folder Lock.
Method 4 – Using a Live OS (Minimising OS Logs)
The most effective way to avoid leaving traces during a transfer is to avoid running the original operating system altogether. In a widely shared answer on Super User, experts recommend booting into a live Linux environment or Windows PE from a USB drive, mounting the source drive read‑only, and copying files from there. Because the live OS runs entirely in RAM, it doesn’t interact with or update the host system’s logs.
Why This Works
- Bypasses Windows logging: Windows auditing and MRU lists run only when Windows is active. A live OS doesn’t write to the Windows registry or event logs.
- Prevents file attribute changes: When Windows reads a file, it may update the last‑accessed timestamp or the file’s metadata. Mounting the drive read‑only in Linux avoids these modifications.
- No device driver logs: Windows typically installs drivers and logs device identifiers when you plug in new hardware. Booting from a USB stick with its own drivers leaves no such record.
How to Transfer Using a Live OS
- Create a bootable USB: Download an ISO of Ubuntu Live, Debian Live or Windows PE. Use a tool like Rufus to create a bootable USB stick.
- Boot from the USB: Insert the USB drive, restart the computer and press the boot‑menu key (often F12 or Esc). Choose the USB drive as the boot device.
- Mount the drives: In the live desktop, open the file manager. Attach your new drive (internal or external). For maximum safety, mount the source drive read‑only (e.g., using the ntfs-3g driver in Linux with the ro option).
- Copy files: Use the file manager or rsync from the terminal to copy data from the old drive to the new one. If cloning the entire drive, you can use the dd command or Clonezilla within the live environment.
- Verify and shut down: Once copied, verify file sizes and contents. Shutdown the live OS.
This method leaves almost no trace on the original operating system. However, network traffic can still be observed by routers or firewall logs. If you upload files to cloud storage, the connection and data volume may be recorded. For ultimate privacy, avoid using network services during the transfer.
Minimising Traces After the Transfer
Transferring data is only half of the job; you must also ensure the old drive doesn’t leak information. Simply deleting files or formatting the disk doesn’t permanently erase them. Operating systems mark deleted files as free space, but the underlying data remains until it’s overwritten. With forensic tools, it’s possible to recover “deleted” files.
Secure Deletion on Spinning Disks
If your old drive is a traditional HDD, you can use secure deletion tools that overwrite data with random bits. The Electronic Frontier Foundation’s secure‑deletion guide explains that secure deletion overwrites empty space to protect deleted files. For Windows, the open‑source tool BleachBit can securely delete individual files or wipe free space. Another option for entire drives is Darik’s Boot and Nuke (DBAN), which overwrites the disk with gibberish before disposal.
To use BleachBit on Windows:
- Download and install: Get BleachBit from its official website and follow the installer; the default settings are usually fine.
- Securely delete a file: Open BleachBit, choose File → Shred Files and select the files to overwrite.
- Wipe free space: Select System → Free disk space to overwrite unused space. Be prepared to let the process run for hours on large drives.
- Verify: After completion, the tool reports the number of overwritten bytes.
Secure Deletion on SSDs and Flash Drives
Secure deletion doesn’t work reliably on SSDs because of wear‑levelling and the TRIM command. EFF notes that even if you overwrite a file on an SSD, there’s no guarantee the data will be overwritten SSDs sometimes write modified files to a different block. The recommended approach is to encrypt the drive from the beginning, so that later you can destroy the encryption key and render all data unreadable. If your SSD wasn’t encrypted, your best bet is to enable full‑disk encryption and then perform a factory reset, ensuring the key is destroyed. Some manufacturers provide secure‑erase commands in the firmware; consult your SSD vendor for details.
Following NIST Media‑Sanitization Guidelines
The U.S. National Institute of Standards and Technology (NIST) publishes SP 800‑88 to guide organisations on sanitising media. The latest draft emphasises that sanitization should render access to data infeasible for a given level of effort and encourages establishing formal sanitization programs. The draft highlights the need for sanitization validation verifying that erasure techniques succeeded. For consumer users, following the “Purge” or “Destroy” recommendations (e.g., using software‑based overwrites or physically shredding the drive) is essential before selling or recycling a drive.
The Role of Encryption : Why Folder Lock Is Ideal
Encryption is a powerful defence against data snooping. Even if someone obtains your data or intercepts a transfer, encrypted files appear as meaningless gibberish without the key. Folder Lock, developed by NewSoftwares, combines encryption, file locking and secure deletion in a single package.
Key Features
- AES 256‑bit on‑the‑fly encryption: Folder Lock encrypts files using 256‑bit AES while allowing you to work with them normally. Files are stored in a virtual drive that expands as needed.
- Kernel‑level file locking: If you prefer not to encrypt, you can hide files and folders using a kernel driver. This makes them inaccessible even in Windows Safe Mode.
- Cloud backup and sync: Encrypted lockers can be backed up to Dropbox, OneDrive or Google Drive and synced across your devices. If your device fails, you can restore the encrypted locker without exposing the contents.
- Selective sharing: Folder Lock allows you to share encrypted files with co‑workers or friends without revealing your password. Using RSA‑based keys, recipients can decrypt with their own unique password.
- Portable lockers: You can create self‑contained encrypted containers on a USB stick for safe transport.
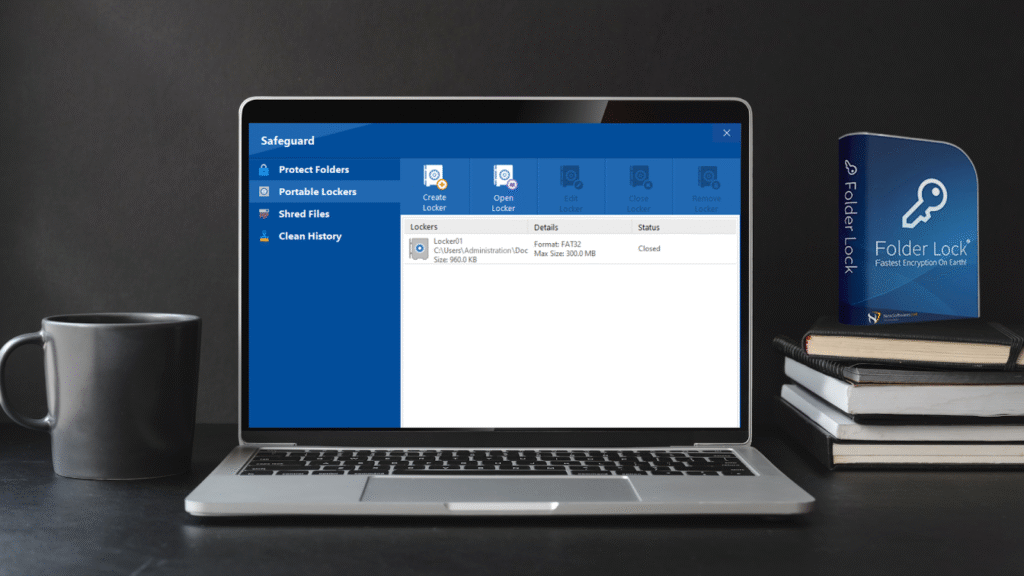
- Shred and clean history: The Shred Files feature permanently deletes files and even wipes free space so deleted files can’t be recovered. The Clean History feature removes Windows privacy tracks such as Quick Access, Run dialog history and other MRU lists.
Using Folder Lock During a Drive Swap
- Install and set up: Install Folder Lock: https://www.newsoftwares.net/folderlock/ on your current computer. Create a master password and choose a secure hint.
- Create a locker: Use the software to create a locker (virtual encrypted drive). The locker expands automatically as you add files.
- Add data: Drag and drop all files and folders you intend to transfer into the locker. You can even include your entire user profile; the encryption happens on the fly.
- Copy the locker: Once the locker contains all your data, copy the locker file to the new drive using cloning, imaging, manual copy or a live OS. The locker will appear as a single file; Windows logs only that a file named, for example, locker.flk was copied. The contents remain hidden.
- Open the locker on the new drive: Install Folder Lock on the new computer, open the locker and enter your password. The encrypted container mounts like a drive, letting you access your files.
- Shred originals: After confirming that everything transferred, return to the old drive and use Folder Lock’s Shred Files feature to permanently delete the original files and wipe free space. This ensures forensic tools can’t recover them.
- Clean history: Finally, run the Clean History tool to remove MRU lists and Quick Access entries left by copying.
By combining encryption, secure deletion and history cleaning, Folder Lock offers a comprehensive solution for transferring data without leaving traces. It ensures that even if someone inspects the new drive, they can’t access the contents without the password. Meanwhile, the shredder and history cleaner mitigate the footprints left on the old system.
Troubleshooting and Verifying Your Clone
After cloning or restoring your drive, you should test it thoroughly. HP’s troubleshooting guide highlights common issues and how to resolve them:
- Insufficient space errors – Clean up the source drive, remove hibernate files or disable system restore. When cloning to a smaller drive, shrink partitions beforehand.
- Boot failures – Ensure the boot partition flags were copied, update BIOS/UEFI settings and set the correct boot order. If necessary, rebuild the BCD (Boot Configuration Data).
- Slow performance – Check that the new drive is connected via the fastest interface (e.g., SATA III vs. USB 2.0), update drivers and enable TRIM for SSDs.
- Data corruption – Verify file hashes or open important files. If problems persist, redo the cloning or restore process.
After verifying, keep a backup image of the source drive in case issues emerge later.
Additional Security Tips and Forensic Considerations
- Disable auditing temporarily: If you control the system, you can disable Windows file and removable‑storage auditing via Group Policy (gpedit.msc). However, this isn’t always possible on corporate machines, and changes themselves may be logged.
- Clear event logs: Deleting the Security event log requires administrative privileges. Use caution: clearing logs may raise suspicion. The better approach is to avoid generating logs by using a live OS.
- Understand what Windows records: Windows Event ID 4663 logs the file name, user and process for each accessed object, while Event ID 4660 indicates deletions. For removable storage, the Task Category is set to Removable Storage and the log includes the device name and the program used for copying. Knowing these details helps you target specific logs if you plan to audit yourself.
- Wipe or destroy old drives: For highly sensitive data, follow NIST’s Purge or Destroy recommendations. Use cryptographic erase for SSDs or physically shred the drive using a degausser or shredding service.
Summary of Transfer Methods
Below is a concise comparison of the transfer methods discussed:
| Method | Best for | Pros | Cons & Trace Considerations |
| Disk cloning | Upgrading to a new drive while keeping OS, apps and settings | Fast switchover; bootable immediately; simple workflow | Copies all logs and unused data; requires enough space on destination; traces remain |
| Disk imaging & restore | Creating portable backups and transferring multiple machines | Flexible; can exclude unwanted files; backups can be archived | Requires external storage; slower process; restore overwrites destination drive |
| Manual file copy | Moving personal files only; planning a clean Windows install | Selective; no extra software | Leaves copy logs and MRU entries; must reinstall applications; risk of missing hidden data |
| Live OS transfer | Minimising OS traces during copying | Runs entirely in RAM; avoids Windows logs; can mount source drive read‑only | More technical; network traffic may still be observed; requires bootable media |
| Encrypted locker (Folder Lock) | Securely transferring sensitive data and erasing traces | AES 256‑bit encryption; kernel‑level hiding; portable lockers; shredder and history cleaner | Requires installation on both machines; forgetting password means data loss |
Frequently Asked Questions
- What’s the difference between cloning and imaging a drive? Cloning creates an exact, bootable copy of your drive that you can use immediately, while imaging creates a compressed file that must be restored before use. Images are more flexible for backups, whereas clones are ideal for direct replacements.
- Will Windows record that I copied files to an external drive? Yes. When removable‑storage auditing is enabled, Windows logs Event ID 4663 for each file written and tags it as Removable Storage. Even if auditing is not explicitly enabled, some logs and registry entries may record recently accessed files. A live OS avoids these traces.
- Can I clone a larger drive to a smaller SSD? Yes, as long as the data fits. Tools like AOMEI Cloner and Macrium Reflect can clone only the used space. You may need to shrink partitions on the source drive first.
- Do I need to format the new drive before cloning? Most cloning software handles formatting automatically, but it’s good practice to initialise the drive in Windows Disk Management and ensure it uses the appropriate partition style (GPT or MBR).
- How long does cloning take? Cloning time depends on drive size, connection speed and the amount of data. HP estimates roughly 30–60 minutes per 100 GB.
- Will cloning copy bad sectors? Most cloning software skips bad sectors by default, but you can choose sector‑by‑sector cloning if necessary. It’s wise to run chkdsk on the source drive before cloning.
- Does encrypting my drive slow down transfers? Modern encryption tools like Folder Lock perform on‑the‑fly encryption, so performance impact is minimal. The main overhead occurs when initially encrypting large files. Once encrypted, copying an encrypted locker is similar to copying any other file.
- Can I manually delete files to erase my data? No. Deleting or formatting only hides the files; forensic tools can still recover them. Use secure deletion tools (BleachBit, DBAN) for HDDs or encrypt and destroy keys for SSDs.
- What if my computer has only one drive bay? Use a USB‑to‑SATA adapter or an external enclosure to connect the new drive. AOMEI’s guide specifically recommends this for laptops. After cloning or imaging, swap the drives and boot from the new one.
- Do I have to reinstall Windows after cloning? No. A proper clone transfers the operating system and boot records. Just ensure you set the new drive as the primary boot device.
- Can I transfer programs manually? Not effectively. Installed applications rely on registry entries and system files. Cloning or imaging is required to move them without reinstallation.
- How can I tell if auditing is enabled on my Windows system? Open the Local Security Policy, navigate to Advanced Audit Policy Configuration, and check Audit File System and Audit Rmovable Storage settings. If enabled, file accesses and removable‑storage activities are recorded.
- Will clearing event logs hide all traces? No. Clearing logs requires administrative rights and may itself be logged. Other artefacts (MRU lists, shadow copies, system restore points) can still reveal activity. It’s safer to avoid generating logs by using a live OS and then perform secure deletion.
- Is Folder Lock suitable for businesses? Folder Lock supports remote sharing via RSA‑based keys, cloud sync and portable lockers. These features make it useful for collaborative environments where confidential files must be shared securely.
- What happens if I forget my Folder Lock password? Encrypted lockers use strong AES 256‑bit encryption. Without the password, recovery is practically impossible. Keep your password and recovery hints in a secure location or use the built‑in secret wallet to store them.
Conclusion
Swapping a hard drive doesn’t have to mean exposing your personal data. By understanding how operating systems log file activity and selecting the right transfer method, you can upgrade your hardware while preserving your privacy. Disk cloning is ideal for quick drive swaps, imaging offers flexible backups, manual copying works for personal files, and live OS transfers help avoid logs altogether. Whichever method you choose, remember to wipe or encrypt the old drive following EFF and NIST recommendations.
For the highest level of protection, Folder Lock combines encryption, file locking, shredding and history cleaning in one package. It lets you transfer data securely, shred the originals and remove traces from Windows, making it a comprehensive solution for anyone concerned about leaving digital footprints. With a little planning and the right tools, you can upgrade your storage and keep your secrets safe.